DIY Solar Panels
Solar is a trendy thing nowadays, with more and more renewable products entering the market – It is time for us to make the shift too. In fact, many homeowners have already shifted to 100% renewable energy, but the only barrier that makes us apart is the cost.
Cost, in particular, is why people are hesitant to make a shift.
But have you ever wonder DIY solar Panel is also a thing? A home is never complete if there are no DIY projects involved, Right? They cost less, they are secure and surprisingly, most of the time they work!
So in our case, is DIY Solar Panel really a thing? Can we convert our building into renewable energy and impress the neighbors (if you’re into it).
Yes, it can happen, but it won’t be like anything you have ever tried before. DIY Solar requires a lot of steps, precautions, and the right set of tools.
Why go Solar?
Going Solar has a lot of benefits, not to mention it’s a great future investment for your financial yearly budget. First and foremost, it reduces your monthly electricity cost, it has a low maintenance cost, and it can even increase your house market value.
Depending on which state you’re living in, you will get an exclusive discount in the Taxation department.
However, don’t get all excited here, going solar comes at a cost. A cost for which you have to think twice or more before you implement it.
But as we said, a DIY solar project will seem useful.
DIY solar system installation – Pros
A DIY Solar project may seem fun, but there are some risks involved too. Here are some pros and cons that you should consider before unleashing your creativity mode.
It saves Money
Although the cost depends on how many solar panels you want in your house, a custom DIY solar PV kit may cost you anywhere from $2000 to $5000. Now go-ahead to any of your nearest solar project planners and get a quote for your house, you will definitely get a more projected price.
Self-Sufficient
Installing a solar panel gives you the pride to convert your house into 100% renewable. There are tons of energy-efficient electronics out there that you can invest in. Remember, saving something from today, will help us out tomorrow.
Less Time Investment
Once you get a hold of what you’re actually doing, the installation time will take very minimal. You can easily go shopping on the weekdays, do the installation on the weekend, with less drilling noise and more precautions.
DIY Satisfaction
A DIY project is always challenging. Once you make up your mind that you really want this, your family will go along with you as well. You will draw so many skill sets like financial planning, electrical work, accounting, proficiency, municipal processes, and more.
Also, there are many stages to doing a DIY solar installation. This includes research, planning, shopping, installation, wiring, monitoring, and permitting. It’s a fun project if all goes well, you’ll feel like a winner.
DIY solar system installation – Cons
Like always, every DIY project has its pros and cons, here are some for the Solar System.
Physical Danger
Height and high voltage electricity is always a risk. Since you will be playing with them for quite some time, one minor mistake can lead you to unimaginative trouble.
Risk of roof leaks
This is perhaps one of the biggest financial risks when it comes to DIY solar installation. Unless you have a flat roof, you might have to drill some holes for the panel to stand. Drilling into the roof comes at great risk.
For example, if you haven’t filled the holes, it might leak soon. Incorrect sealing can also cause structural damage, leading to more problems in the future.
Poor Quality of Solar Panel Kits
We never know if we’re buying a good quality product or not, especially if we’re completely new to something. If you want your system to last longer, make sure you buy solar panel kits that offer 10+ years of warranty.
10 Steps to Make Your Own DIY Solar Panel at home
Now that we have covered some of the basics, let’s complete the project, shall we?
1. Planning and Research
If you haven’t already, do some research and planning first. A work without a path is really a mess.
Set aside your goals that better determine your motive. Sure you want renewable energy, but the main incrementation is the resources. Some of the goals homeowners should choose include
- Financial Savings
- Backup Power
- Energy self-sufficient
2. Choosing the right solar panels
The next decision is to choose the right set of solar kits that matches your goals. There are two types of solar kits you can buy from the market
2.1 Roof Mount Solar Kits: For residential solar projects. The kit comes with a racking system for a secure connection.
- Best for: There’s no need for additional space as our roof is the foundation. It is also cost-effective and easier to install.
- Things to Consider: Roof constraints may limit the size of the system.
2.2 Ground Mound Solar Kits: These are installed on uneven lands. The kit comes with an adjustable racking system to change the panel direction. They also require less maintenance as there’s no modification required.
- Best For: They have flexible installation and cost-effective maintenance.
- Things to consider: Requires a strong soil foundation to hold the mounts.
3. Check out your local laws
Depending on the state you’re living in, you might have to follow a wide range of rules and regulations. For starters, you will surely need a utility and building permit before you install the panels.
This includes an on-site inspection from the authorities. Once they pass the test, you can activate and connect your grid. It is important that you specifically mention all the appropriate details. It is a worthwhile option to pursue.
4. Design the system
This is where things get a little complicated. You might have to account for the following factors
- Solar Panel orientation and angle
- Natural efficiency drop
- Your house energy usage
- Power consumption
- Conversion losses
- Battery charging and size
- Wiring orientation
- Shading
- Expandability
Remember having a larger battery doesn’t mean that you will get the most advantage. If it’s too big, you might end up failing the capacity to charge sufficiently. Make a useful blueprint before you apply for the permit.
5. Perform all the calculation
By this point, you will get a clear idea of the panel design as well as the regulation you have to follow along the way. Now get specifics on the numbers and figure out the savings and costs.
The most important thing here is to figure out the utility bill savings. Using the system’s overall design and capacity, you can figure out the annual electricity cost of the system. Now compare it with your previous year’s utility bill, you will get a rough estimation. While it is better to project ahead, always keep in mind the inflation cost. You never know when the prices hike up.
6. Buy a Solar Panel Kit
Since most homeowners don’t know how conductors and diodes work, it is better that you buy an all-in-one solar panel kit. They have everything you need to get started. The solar panel kit includes:
- Solar Panels
- Inverters
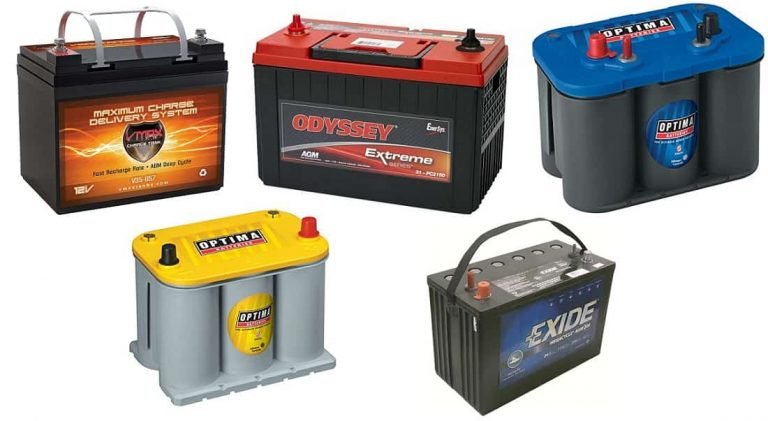
- Battery Backup
- Ridge Racking
- Monitoring System
Most of the time, the kit includes an installation template as well. Just follow it and you’re good to go.
7. Reevaluate your project
Before you actually go down to the installation process, just recheck your calculation and all the related paperwork. This is the point that tells you if the DIY project is better for your home or not.
If things seem difficult, it is better that you outsource them. You don’t want your hard-earned money to get all waist.
But if you understand the basic concept and have already performed all the necessary tasks. Get your hands dirty and get on with it.
8. Buy the Supplies and Kit
Now it is time to go out some shopping. Get quotes from different solar companies to get the best deals. Remember, your target is to capture sales plus reliability. Also, make sure that you buy the original, authentic products that offer 20+ years of coverage.
Ideally, it is better that you buy a complete DIY kit from the same brand. This will save you time and effort.
9. Install the Panels
At this point, you have done all the paperwork, shopping, and calculation. It is now time to actually do the hard work.
The actual installation depends on your roofing and what type of panel kit you’ve bought. A basic DIY installation process includes the following points.
- Install the racking and mounting: Caulk the area of measurement and drill into the installation lag bolts.
- Connect Microinverters: Connect all the modulate to the panels
- Connect Grounding Wire: This is an important safety precaution
- Install junction box: Install junction box with the roof array
- Install the Panel: Place the panel onto the racks and connect the power cables to the outsource
10. Test the system
Once the installation is complete, test the system. Don’t directly connect all the major electronic devices. Start from low-voltage electronics, just for the sake of testing purposes.
These days, the most solar kit comes with a dedicated measuring app. You can use it to check the panel status, battery health, voltage, and voltage level.
Also, side note, depending on your state, you may want to reevaluate the permit once you complete the installation. The authorities may come to your house for inspection.
Diy or Not – Energy Saving has its own benefits
If you’ve read the entire content, and still wondering if you should take the risk or not – The pride in producing your own clean energy has its own perks. Not to mention the satisfaction of receiving much lower electricity bills.
If you have the crafting skills and time, you can perform wonders on your DIY project. Since you know your house better than any of the outsiders, you will work more carefully and professionally.
Either way, we encourage you to check the DIY kits before you make the purchase. The higher the quality, the more your investment will be secured.
Frequently Asked Questions
Are DIY solar panels worth it?
DIY Solar panels are totally worth it if you know what you’re doing. Proper calculation, the right set of paperwork, and equipment can prove wonders for you.
How many solar panels do you need to run a home?
This depends on your actual usage and the number of electronic equipment you have in your house. Generally speaking, you may need 28-35 solar panels to convert your full house into 100% clean energy.
How much does it cost to make your own solar panels?
Since you’re the one making all the efforts and installation, the cost actually depends on the kit. The more panels you will have in your kit, the higher the price.
Can we run the refrigerator on solar power?
Yes, you can run the refrigerator on solar power as well. For this, you have to invert the power in the battery and use it at night.
Is it cheap to build your own solar panels?
A DIY solar project always cost lower, however it comes with limitation too. You may have to plan ahead for your solar needs requirements.
